Why Professional Boat Lighting Installation Transforms Your Yacht Experience
A professional boat lighting installation improves your yacht’s safety, aesthetics, and functionality, creating an unforgettable ambiance on the water. This guide covers the essentials for a professional-grade installation.
Essential Steps for Boat Lighting Installation:
- Plan your project – Select appropriate lights and gather marine-grade materials.
- Prioritize safety – Disconnect power and follow all electrical protocols.
- Mount and seal – Use proper drilling techniques and marine sealants.
- Wire correctly – Create waterproof connections with heat-shrink tubing.
- Connect to power – Install dedicated switches and properly sized fuses.
- Test thoroughly – Verify all lights function before final mounting.
Beyond simple illumination, professional boat lighting serves multiple purposes. LED lights improve your vessel’s style while providing essential safety lighting with visibility up to three miles. Modern systems offer remote smartphone app color control and flexible options for nighttime fishing or entertaining.
Marine installations must withstand saltwater, extreme temperatures, and constant vibration. Success depends on using 316 stainless steel hardware, marine-grade cables, and IP67 or IP68 waterproof connectors.
As one experienced installer noted: “Let’s face it, there is no need to install underwater lights. They won’t make your boat go any faster or handle better … but boy do they look cool!”
I’m Cole Reilly. With nearly two decades of experience in yacht lighting and over 10,000 completed projects, I’ve seen how proper boat lighting installation transforms vessels. My expertise in custom yacht signage has taught me that attention to detail is key to achieving professional results.

Simple Boat lighting installation word guide:
Planning Your Project: Choosing the Right Lights and Materials

This section covers selecting the appropriate lighting and gathering all necessary components for a successful installation.
A successful boat lighting installation begins with smart planning. Choosing the right components from the start is the difference between a professional result and a project gone wrong. I’ve seen many boat owners use lights that aren’t truly marine-grade, leading to flickering or failure. Let’s ensure that doesn’t happen to you.
Types of Marine Lighting and Their Uses
Understanding the purpose of each light helps you make smarter choices.
- Navigation lights: These are a legal requirement (red port, green starboard, white stern) and must meet USCG standards.
- Deck lights: Illuminate pathways and cockpits with flush-mounted, low-power LEDs for daily life aboard.
- Spreader lights: Mounted high on the mast, they flood the deck with bright light for rigging or other tasks.
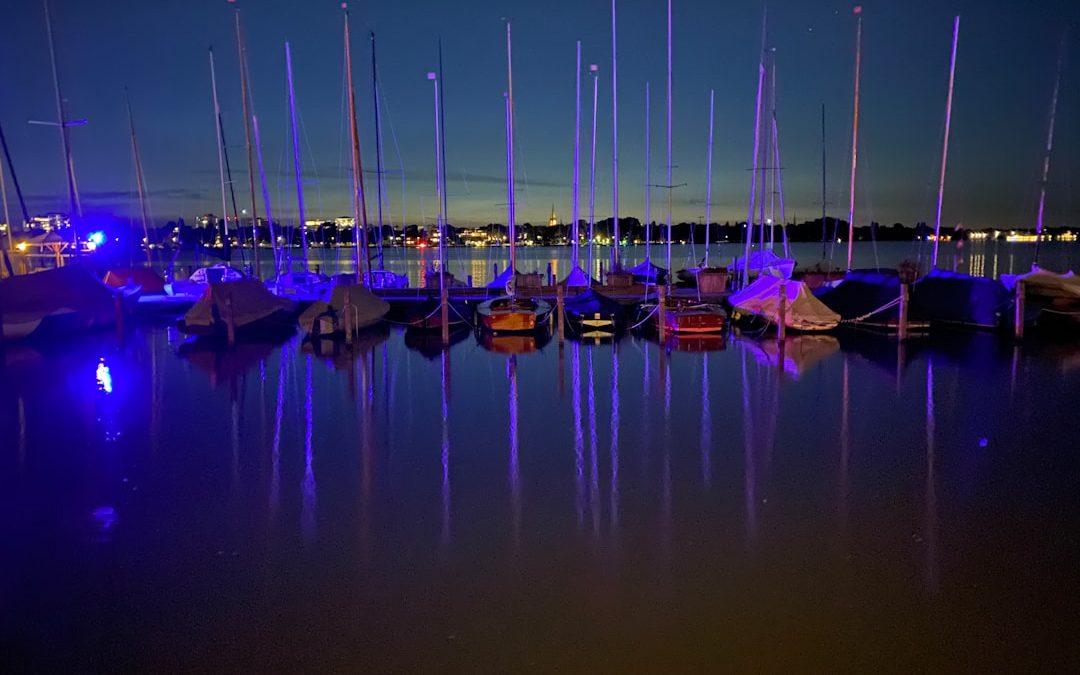
- Underwater lights: These transform your vessel’s appearance after dark. Blue light travels farthest in saltwater, while green is effective in freshwater.
- Accent and strip lighting: Flexible LED strips highlight architectural features, illuminate storage, or create ambient light in cabins.
- Illuminated boat names: The ultimate in personalization, our custom illuminated yacht signs combine design with visibility.
- Cabin lights: Provide interior lighting, from reading lights to galley task lighting, for comfortable living aboard.
Selecting the Perfect Lights for Your Yacht
Choosing lights involves balancing vision and needs.
- Brightness (Lumens): Task areas like galleys need higher lumens, while ambient spaces benefit from softer light. Avoid overly bright, harsh lighting.
- Color Temperature: Warm white (2700-3000K) creates a cozy, inviting feel. Cool white (5000-6500K) provides crisp, functional light for work areas.
- Color-Changing (RGB/RGBW): These systems offer versatility, allowing you to switch from warm white for dinner to blue for underwater ambiance via a smartphone app.
- IP Rating: This is critical. IP67 lights handle spray and temporary submersion (ideal for decks). IP68 lights are for continuous underwater use (essential for hulls). Never compromise on IP ratings.
- Custom LED Yacht Signs: For ultimate personalization, we craft signs from marine-grade materials like 316L stainless steel to ensure they look stunning for years.
Essential Tools and Marine-Grade Materials
Having the right tools and materials is crucial for a safe, durable installation.
- Tools: A drill with marine-grade bits, hole saw, wire strippers, a quality crimping tool, a heat gun for seals, and a multimeter are essential. Fish tape helps route wires.
- Materials: Use only marine-grade cables that resist UV, salt, and corrosion. Choose waterproof wire connectors (IP67/IP68) and double-wall, adhesive-lined heat shrink tubing for reliable, sealed connections. Use marine-grade sealant (3M 5200 for permanent, 4200 for semi-permanent) and properly sized fuses. All mounting hardware should be 316 stainless steel to resist corrosion, using nylon washers to isolate dissimilar metals.
Safety First: Critical Precautions for Marine Electrical Work

Safety is non-negotiable during a boat lighting installation. The marine environment presents unique electrical hazards, so adhering to strict safety protocols is essential to prevent personal injury and equipment damage. After nearly two decades in the industry, I know that the ocean does not forgive shortcuts.
Electrical Safety Protocols
Follow these protocols without exception:
- Disconnect all power sources: Turn off every battery switch and unplug all shore power connections before touching a wire. This is the golden rule.
- Verify circuits are dead: Use a multimeter to test every wire you plan to work on after disconnecting power.
- Understand DC vs. AC systems: Most lighting uses safer 12V/24V DC power, which can still cause fires if shorted. High-voltage 120V/240V AC systems from shore power or generators can be lethal. Treat AC circuits with extreme caution.
- Use proper fusing: Every new circuit requires a correctly sized fuse or circuit breaker to prevent electrical fires.
Environmental and Material Considerations
Your installation must withstand constant assault from the marine environment.
- Prevent galvanic corrosion: When dissimilar metals are in contact in saltwater, they create a battery effect that corrodes the weaker metal. Use 316 stainless steel hardware for superior corrosion resistance. When connecting dissimilar metals, isolate them with nylon washers or a dielectric compound to prevent this.
- Use marine-grade components: Every cable, connector, switch, and fixture must be designed for the harsh marine environment. Automotive or household parts will fail and create safety hazards.
Handling Modern LED Electronics
LEDs are sophisticated and require careful handling.
- Prevent Electrostatic Discharge (ESD): Sensitive LED circuits can be destroyed by static electricity, especially in low humidity. The damage is often invisible but permanent.
- Ground yourself: Before handling LED components, touch a large, grounded metal object. An anti-static wrist strap is inexpensive insurance.
- Protect controllers: Mount sensitive electronic drivers and controllers in dry, protected locations away from moisture, extreme heat, and vibration. These are the brains of your system; protect them well.
The Complete Boat Lighting Installation Guide

This step-by-step guide details the core procedures for a professional-grade boat lighting installation. Following these steps ensures a result that is both beautiful and durable, separating amateur work from professional results.
Step 1: Mounting and Sealing
Precise mounting and bulletproof sealing are the foundation of a successful installation.
- Measure and place carefully: For deck lights, use fixed reference points to ensure symmetry. Mount underwater lights low on the transom so they remain submerged at rest. For custom illuminated boat names, precision is paramount.
- Check for obstructions: Before drilling, inspect behind surfaces for fuel lines, fittings, or wiring. Measure twice, drill once.
- Drill pilot holes: Start with a small bit (e.g., 1/8-inch) to prevent your larger bit or hole saw from wandering on the gelcoat.
- Use a hole saw correctly: For through-hull fittings, start the saw slowly to establish a cut, then increase speed with firm, consistent pressure. Let the saw do the work.
- Seal cored hulls with epoxy: If your hull is cored, drilling exposes the core to water. To prevent this, dig out the core material around the hole’s interior, creating a small cavity. Fill this void with thickened epoxy to create a solid, waterproof barrier.
- Apply marine-grade sealant: Use a generous bead of 3M 5200 (permanent) or 4200 (semi-permanent) around the light’s flange and under screw heads for a watertight seal. Clean up excess immediately.
Step 2: A Guide to Proper Boat Lighting Installation Wiring
Professional wiring is essential for reliability in the harsh marine environment.
- Run wires safely: Route wiring through protected channels, away from sharp edges, moving parts, and heat sources. Secure cables every 18 inches with clamps, but don’t overtighten.
- Create waterproof connections: Use butt connectors with adhesive-lined heat shrink tubing. Crimp them firmly and apply heat until you see adhesive emerge, confirming a watertight seal. For critical areas, use IP67/IP68 rated inline connectors.
- Use adhesive-lined heat shrink tubing: Protect any exposed wire ends or splices with double-wall, adhesive-lined tubing for moisture protection and strain relief.
- Leave a service loop: A small loop of extra wire at each connection point prevents stress from vibration and provides slack for future service.
- Differentiate AC and DC wiring: Most lights are 12/24VDC (red positive, black negative) and are polarity-sensitive. High-voltage AC wiring is more dangerous; if you are not completely comfortable with it, hire a professional marine electrician.
Step 3: Connecting to Power and Final Testing
This final phase brings your project to life.
- Connect to a dedicated switch and fuse: Install a marine-grade switch on your panel, creating a dedicated circuit for your new lights for easier control and troubleshooting.
- Size the fuse correctly: Fuses protect the wire, not the device. Calculate the total current draw and size the fuse slightly above this load (e.g., a 5-amp fuse for a 2.1-amp load). Never oversize a fuse.
- Label new circuits: Clearly label the new switch and fuse on your panel for safety and future maintenance.
- Test all functions: Before final mounting, reconnect power and test every light. Verify they illuminate correctly, respond to controls, and display the proper colors. This is your last easy chance to find and fix problems.
Maintenance and Troubleshooting

Proper maintenance ensures your lighting system remains reliable. Even the best boat lighting installation requires ongoing care to withstand the harsh marine environment. A few minutes of attention can prevent hours of frustration.
A Proactive Maintenance Checklist
Regular care keeps your lights shining and connections secure.
- Clean lenses: Rinse all lights with fresh water after each saltwater outing to remove salt residue, which can reduce light output. Use mild soap and a soft cloth for stubborn spots.
- Inspect wiring: During regular checks, look for signs of chafing or corrosion (green or white powder) around terminals and connections.
- Check seals and hardware: Vibration can loosen hardware. Check through-hull fittings and light mounts for cracked sealant or loose screws. Even the best sealants on our illuminated yacht signs need periodic inspection.
- Test lights regularly: A quick monthly test of all lighting circuits ensures they work when you need them.
Solving Common Boat Lighting Installation Problems
Even with diligent maintenance, issues can arise. Here’s a guide to common problems:
| Issue | Possible Causes | Solutions |
|---|---|---|
| Flickering lights | Voltage drop (dying battery, undersized wire); Loose connections; Moisture in fixture; Faulty LED driver | Check battery and wire gauge; Tighten connections; Inspect for water and reseal; Test or replace driver |
| Dim lights | Undersized wiring; Low battery; Corroded connections | Verify wire gauge; Charge/replace battery; Clean contacts and apply dielectric grease |
| Blown fuses | Short circuit; Overloaded circuit; Incorrect fuse size; Power surge | Inspect wiring for damage; Reduce load; Verify fuse rating; Check for system irregularities |
| No light | Failed switch; Broken wire; Corroded breaker; Blown fuse; Dead LED | Test switch; Check wiring; Clean breaker contacts; Replace fuse; Test LED with good power source |
When troubleshooting, work systematically from simple to complex. A multimeter is invaluable for checking voltage. Voltage drop is a common culprit, as LEDs are sensitive to low voltage, especially over long wire runs.
When to Call a Certified Marine Technician
Some situations require professional expertise for safety and to protect your investment.
- Complex wiring scenarios: Involving multiple circuits, control systems, or persistent issues that are hard to diagnose.
- High-voltage AC systems: Work on 120V or 240V systems should always be handled by a qualified professional.
- Custom lighting installations: Professional installation of our illuminated boat names or LED yacht signs ensures perfect alignment and seamless integration.
When seeking help, look for ABYC-certified technicians who are trained in marine electrical standards. The investment in professional service pays for itself in reliable, safe repairs.
Frequently Asked Questions about Boat Lighting
How much does professional boat lighting installation cost?
The cost of a professional boat lighting installation varies with project complexity, light types, and vessel size. For example, underwater lights typically require about two hours of professional labor per light due to the technical nature of through-hull mounting and sealing. Accent and deck lighting costs depend on the number of fixtures and wiring complexity. Custom projects, like our illuminated yacht signs, are quoted individually based on design, materials, and installation requirements.
What IP rating is necessary for boat lights?
Choosing the correct IP rating is crucial for a durable boat lighting installation.
- IP67: This is the minimum standard for lights exposed to spray, rain, or washdowns, such as deck and exterior accent lights. It ensures protection against temporary submersion.
- IP68: This rating is essential for underwater lights, as it guarantees protection against continuous, long-term submersion. Never use a lower-rated light below the waterline.
For our custom illuminated yacht signs, we always use the highest IP rating appropriate for the mounting location to ensure longevity and performance.
Can I install underwater lights myself?
This depends on the light type and your skill level. Surface-mount underwater lights can be a DIY project for boat owners comfortable with marine electrical work.
However, through-hull underwater light installations are best left to professionals. This process requires drilling a hole below the waterline, where a mistake can have catastrophic consequences. Professionals are equipped to handle precise drilling, properly seal cored hulls with epoxy, and ensure all connections are watertight and meet marine safety standards. Their work is typically warrantied, offering peace of mind that is well worth the investment.
For other custom lighting, like our illuminated boat names or LED yacht signs, professional installation guarantees a flawless finish and proper electrical integration.
Conclusion
A professional boat lighting installation lifts your vessel, blending style, safety, and sophistication. Success lies in meticulous planning, using high-quality marine-grade components, and adhering to strict safety protocols. When done right, the result is a durable, beautiful system that performs flawlessly for years.
The marine environment is demanding, but by following the techniques in this guide—using 316 stainless steel hardware, correct IP ratings, and prioritizing safety—your installation will stand the test of time.
For yacht owners seeking the ultimate expression of on-water elegance, custom lighting solutions make all the difference. At YachtSigns, we have spent nearly two decades perfecting marine illumination. Our illuminated yacht signs and LED yacht signs merge traditional craftsmanship with modern technology.
Whether you desire neat illuminated boat names or a comprehensive lighting system, our bespoke approach ensures your lighting perfectly complements your vessel’s character. The investment in quality lighting pays dividends every time you see your yacht illuminated against the evening sky, knowing every detail is perfect.